You get to the following dialog via the Local Settings button in the Connection window or via the tool symbol in the OUTREACH|IT itself (see User interface):

There are more settings available in the tab Additional options.
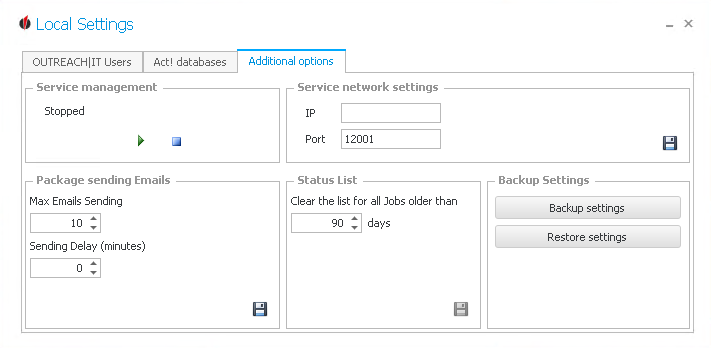
In the field service management you have the possibility to manually stop the OUTREACH|IT windows service with the  symbol or start it with the
  symbol.
What is practical about OUTREACH|IT is that it is run automatically and without manual commands as a windows service in the background. As soon as you have created a schema (what does OUTREACH|IT?) and a corresponding job (when and how often does OUTREACH|IT execute the schema?) the job will be performed at the times you have chosen.
Please pay attention that your computer is turned on! No jobs will be executed on a switched of computer.
In the field Service network settings you can decide on a server the windows services will be performed on. For that you have to enter the IP address and the port of the server. You can request this information from your system administrator. With a click on the  symbol you save the network settings.
OUTREACH|IT is able to send automatized e-mails for you. Enter the maximum amount of e-mails which should be sent at once. Then enter the Sending Delay, meaning how many minutes pass in between sending the separate e-mail "packages". You can save the settings with a click on .
You will be classified as spam by your customers' e-mail providers when you send out too many e-mails at once. This is a good strategy to get around a spam classification.
In the field status list you indicate which jobs should be deleted. All the jobs that are older than a certain amount of days will automatically be deleted from the status list by OUTREACH|IT. Save the canges with the symbol.
Lastly you are able to create a backup by clicking on Backup settings, or import an existing backup by clicking on Restore settings.
After clicking on Backup settings you can choose a folder you want to save the backup to and enter a name for the backup:

Then click on Save. The following window will appear:
Click on OK. You have successfully created a backup!
If you want to import an existing backup, click on Restore settings. The following window appears:

Click on Open.
Click on Yes. You successfully restored your backup.
Once you have completed all of your local settings click on the X in the upper right corner:
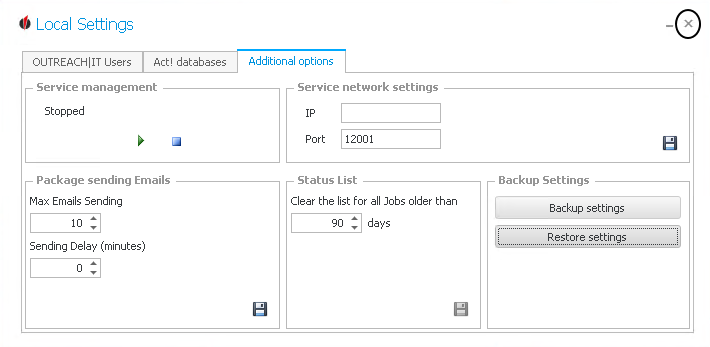
You will now see the window from the beginning again:

The next step is setting the language.
