At the moment pictures that you enlarged or minimized in the Report Designer are sent out in their original size. If you want to make sure that the picture appears in the desired size we recommend you change the size of the picture file before uploading it to the Report Designer.
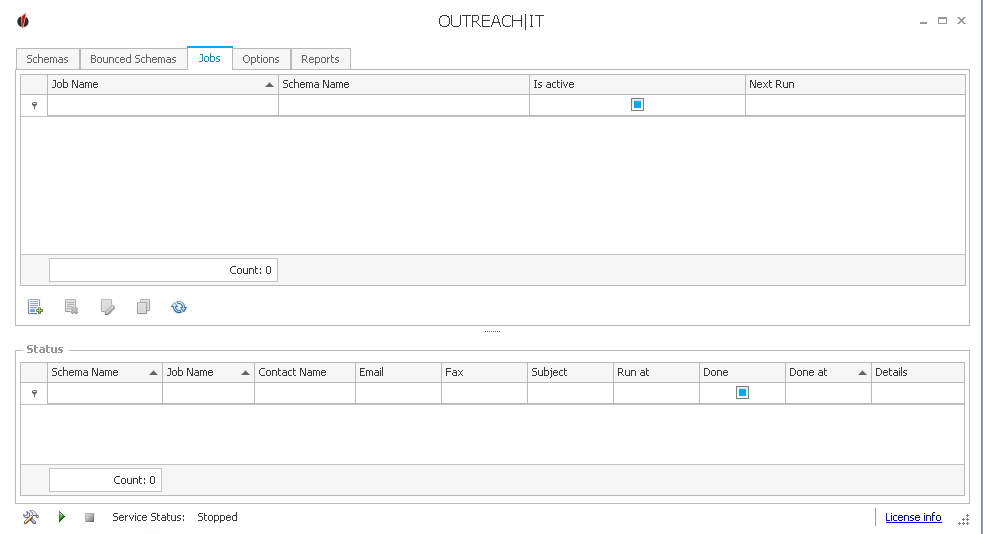
Click on the  symbol in order to create a new job. The following window will open:

Go on Next. You will get to the job configuration:

First you enter the job name. Then you decide on the job type, meaning if you want to run an OUTREACH|IT schema or a bounced schema. You can also pick Drip Marketing which enables you to add several OUTREACH|IT schemas.
Next, you choose either a schema or a bounced schema. If you have not created one yet you can find out how to create one in the chapter Schemas or Bounced Schemas.
Tick Job is active if you want to activate the job immediately.
If you have not activated the job no e-mails will be sent.
You also have the possibility to send an e-mail when the job is done. For that, you will have to choose an e-mail account which can be added in Options, as well as an e-mail address the notification should be sent to (Mail to) and maybe also an e-mail address for the dispatch of a copy (Send CC e-mail to).
In the end you choose the log level which determines the accuracy of error recording.
With the setting Info the error recording is limited to general information. With Debug the error recording is set to high and with Trace to very high.
The occurrence of an unexpected situation will be noted when you set Warning.
The more exact errors are logged the more computer resources are used for the logging process and that is why the usage will then take a little longer. Thus, the option Info is best for daily usage.
If you have a problem with OUTREACH|IT, however, our support technicians are happy to help you. By setting the trace level to debug or trace more information can be collected. You can forward this to us with a ticket (more under How to create a ticket in the SUPPORT|SUITE).
In the end you click on Next. You will get to the section Recurrence Configuration.

First you enter the start time. Then you decide whether the job will be executed daily, weekly, monthly, every year or every minute.
For daily you choose whether the job should be run on work days (Monday to Friday) or every x day.
For weekly you state which time lag the job should be executed with (meaning every week, every two weeks,...) and tick the desired weekday.
For monthly you can either choose the exact date in the month as the execution date or, for example, every third Tuesday. There is also the possibility to execute the job in certain intervals (for example every month, every second month).
For weekly you either enter the exact date or, for example, the second Wednesday in March.
For every minute you type in every how many minutes the job should be executed.
Then you enter the start date and decide whether you do not want do set an end date, whether you want to stop the job after a certain number of runs or if you want to stop the job on a certain day.
In the end you click on Preview in order to check your settings.
If you set everything correctly, click on Next:

If you marked the job as active the service status running will appear here, if the job is not active, the status stopped will be shown. You can start the job with a click on the  symbol and end it with the
  symbol.
In the end you click on Finish. You succesfully created a job.
