You can determine which users and teams have access to which contacts.
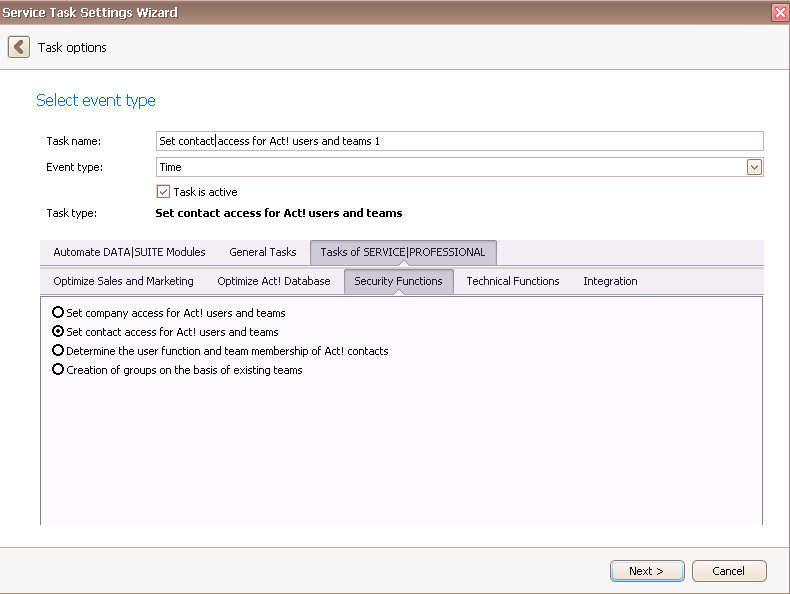
Once you have set the task type Set contact access for Act! users and teams you click on Next.
You will get to the schedule options. Continue reading in the Trigger Time / Trigger Task chapter to find out how to proceed.
Click on Next.
The following window will open:
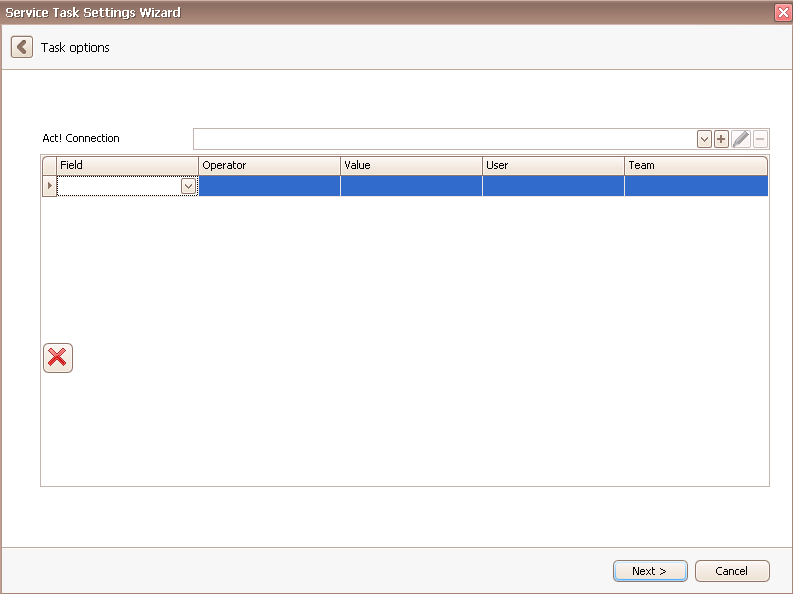
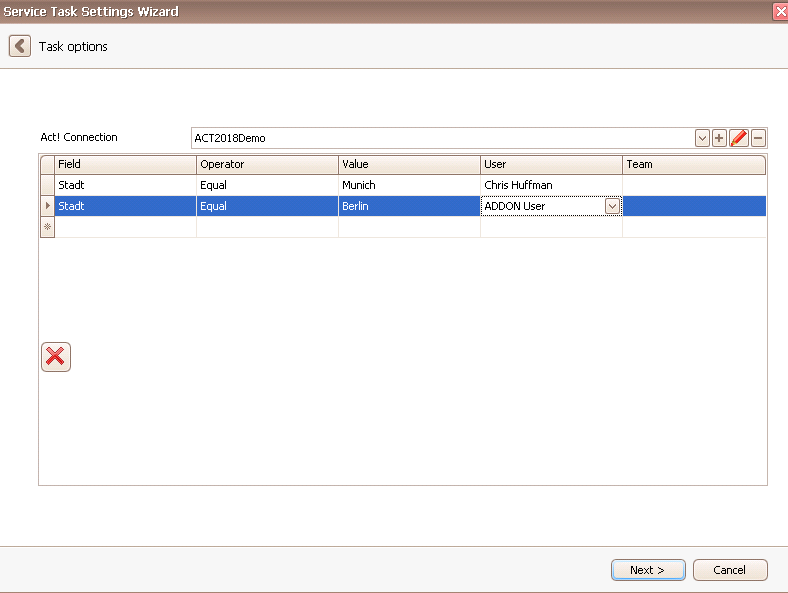
Firstly you choose an Act! connection. You can read more about that in the chapter Connect DATA|SUITE with Act!.
Then you enter the conditions under which a user or a team has access to a certain contact. For example, you can set that user 1 only has access to all of the contacts that are in Munich, user 2 only to all of the contacts that are in Berlin etc.
You have the possibility to delete some of the rows by selecting them and then clicking on the  symbol.
Once you set everything according to your wishes you go on Next.

In the end you click on Finish. You successfully created as task to set the contact access for Act! users and teams!
