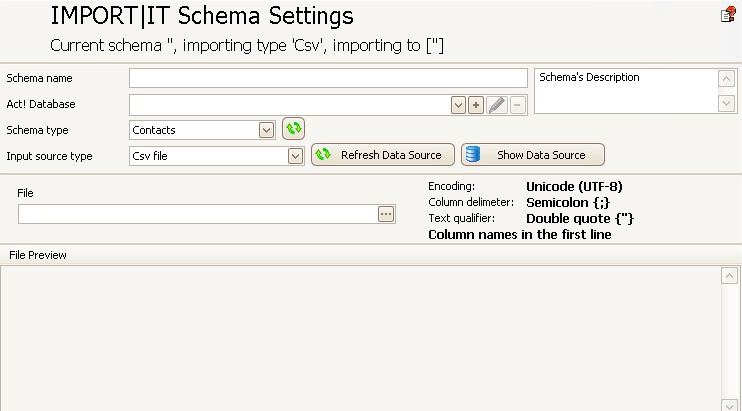
After you have given the schema a name and created an Act! database connection you now have to state the source file type and the source file directory as well as a schema type.
These are the instances you can choose for schema type:
Contacts, Companies, Secondary Contacts, Groups
(Standard, Advanced and Professional Edition),
Notes (Standard, Advanced and Professional Edition),
Histories (Standard, Advanced and Professional
Edition), Custom tables (only possible
with TABLE|IT) Contact Relationship, Extended Products
(those are the products/services you can find as a tab
for the Opportunities, only available with Advanced and
Professional Edition), Opportunities (Advanced and
Professional Edition), User (Advanced and Professional
Edition), Teams (Advanced and Professional Edition)
For the source file type you can choose from the following formats:
CSV file, Microsoft Excel (Advanced and Professional
Edition), Microsoft Access (Advanced and Professional
Edition), FoxPro (Professional Edition), Act! 2008+
(Advanced and Professional Edition), XML file (Advanced
and Professional Edition), Oracle Server (Professional
Edition), Microsoft SQL Server (Professional Edition),
Paradox (Professional Edition), My SQL
Server (Professional Edition), Microsoft
Navision (Advanced and Professional Edition), ODBC-
Verbindung (Professional Edition)
|
If you want to import multiple values into a field, such as multiple users for access permission, separate them with ; |

If you click on the three dots ... behind the File field when importing a CSV file the following window opens:

Click on the three dots ... behind the empty field.
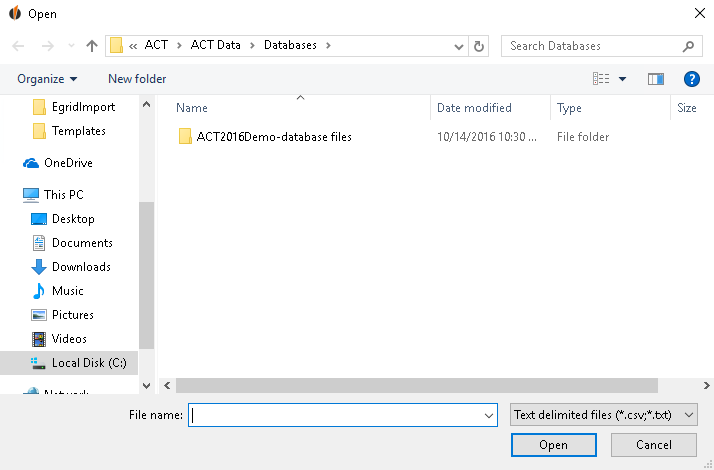
You can now choose the file you want to import.
Please be careful that you choose a file that has the ending of the previously chosen source file type.
Then click on Open.

Then you click on Next.

When importing a CSV file you now have to choose the column delimiter, the text qualifier and the encoding. If you do not know those ask the creator of the CSV file. Below that you can see a preview of the data.
Now click on Next.

If you want to import an Excel file you have to choose a Worksheet.
For Microsoft Access, Fox Pro and Paradox you have to choose Table/View, for Act!2008+ Tables and for XML file Rows and Columns.
If you want to import data records from Oracle Server you first you have to type in the Connection string and then click on the key symbol. That is how you can connect to the server. After that you choose a Table.
For Microsoft SQL Server you first log into the Server (click on the +):

Type in the Connection name, the Server/Instance and the Authentication type. After that you log in with your user name and password and click on Test Connection. Finally you click on OK. Now you have to choose the Database and the Table/View.
If you want to import something from MySql Server you have to state the Host and Port as well as the User name and Password. Then you test the connection by clicking on the key symbol. After that you can choose a Database and a Table/View.
For Microsoft Navision you add a database with the +. Then you specify the database choice and choose a Company as well as an Entity.
When you want to create an ODBC Connection you can either use DSN (=Data Source Name) or an ODBC Connection String. Then enter the SQL Command and click on Test Connection.
You have chosen the file successfully.

You should be able to see your file in the File preview.
Now you can save the schema by clicking on the Saving Symbol.
After saving additional menu points will appear in the navigation bar. These are the settings you will have to go through.

Since the settings for every type of schema are different the different approaches for each schema type will be explained in the next chapters.
We also created two examples about how to import addresses and complete names, as well as a few tips for importing Yes/No fields.
