The ADDON automatically recognizes e-mails that could not be delivered and moves the e-mail recipients to a separate group in Act!.
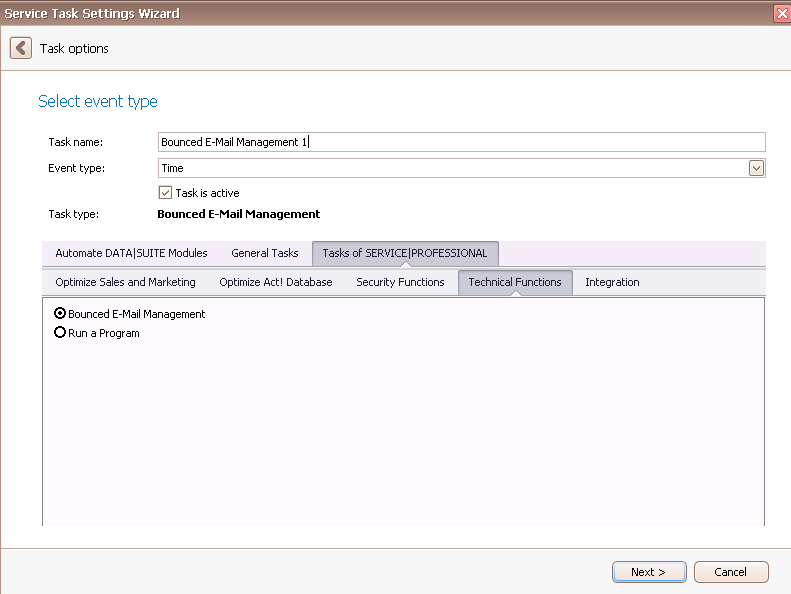
Once you have set the task type Bounced E-Mail Management you click on Next.
You will get to the schedule options. Continue reading in the Trigger Time / Trigger Task chapter to find out how to proceed.
Click on Next.
The following window will open:
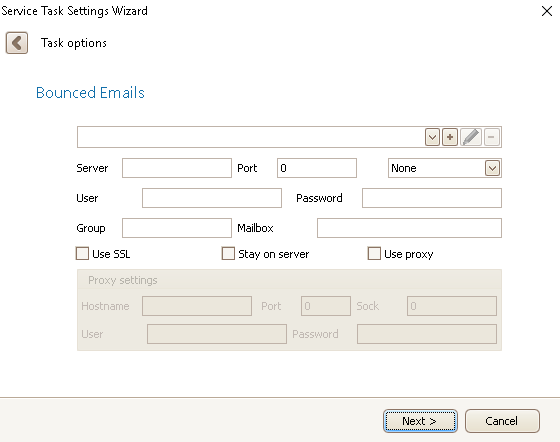
First you choose a database. You can read about how to do this in the chapter Connect DATA|SUITE with Act!.
You can request information about the server, the port, the server type, the user and the password from your e-mail provider.
Next you enter the group the contacts of those bounced e-mails will be added to.
Under mailbox enter the mailbox of your e-mail account, e.g. unknown.
You can use SSL to encrypt your data.
Also, you have the possibility to leave replies to those bounced e-mails on your server.
Like already for creating a new FETCH|IT schema you can use your own Proxy settings.
Now click on Next.

In the end you click on Finish.
You have created a task for Bounced e-mails.
