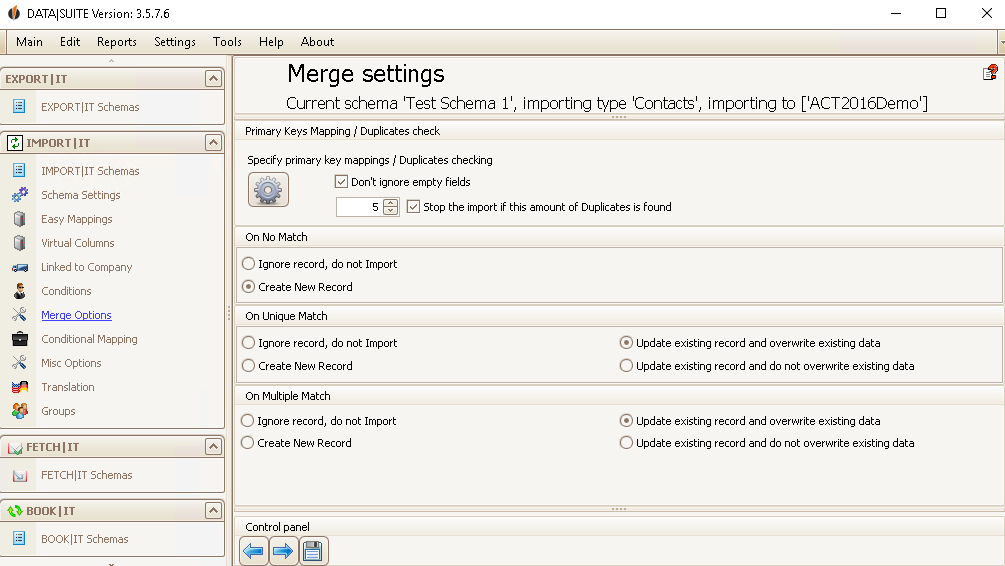
Here you can change the settings for the duplicate check.
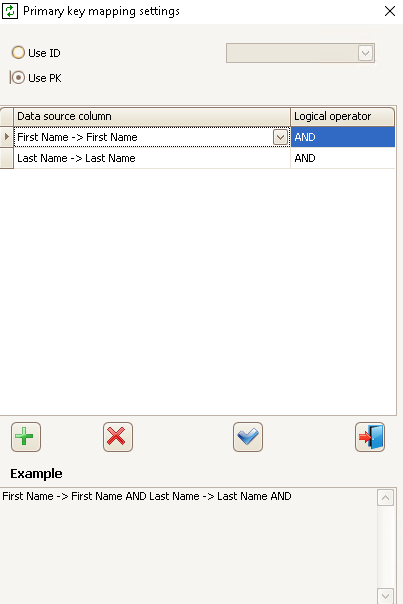
When you click on the gear wheel the following window appears:
Here you can choose with which fields the duplicate check will be done. Either you use the primary key fields (the possibility to create individual criteria and to connect those) or use ID. Choose the desired source field that contains the Unique ID (more information in the overview section of the IMPORT|IT manual) with which the duplicate check should be performed. This way you simultaneously assign the the Unique ID from your source field to the (new) contact in Act! during the import.
Here you specify the fields that will be used for the duplicate check. You can use either Act!'s Unique ID or check for duplicates in mapped fields. When you are done, click on OK.
If you tick Don't ignore empty fields then empty fields will be paid attention to as well during the duplicate check.
For Stop the import when this amount of duplicates is found the import will stop when the previously set number of duplicates could be found.
You can also set what happens when no similar data record exists yet. The recommended option here is Create new record.
If a duplicate could be found you can choose between Ignore record, do not import, Create a new record, Update existing record and overwrite existing data and Update existing record and do not overwrite existing data.
You can also choose between those options when several duplicates are found.
In the end you click on the Save symbol.
The next step is Conditional Mapping. |