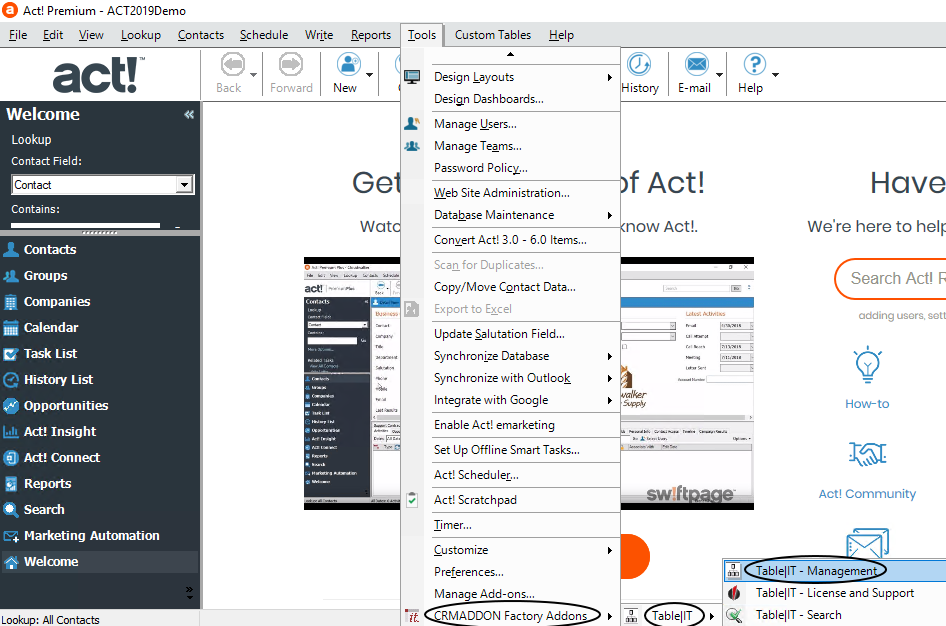
Open the Table Manager for Act!: Tools > CRMADDON Factory Addons > TABLE|IT > TABLE|IT Management.
With that you open the dialog window Table Manager for Act!.

At first, please check if the correct table is chosen, meaning the table you want to edit.
If this is the case click on the button New field to create the desired field in your table.

You are now able to define several properties for the new field that is to be created.
For field name (1) you enter a name for the field.
For field type (2) you determine what kind of values the fields are allowed to be filled with.
Tick the option Allow empty field (3) to make it possible to save the data record even when the particular field is empty.
If you choose Read Only (4) the data in this field cannot be changed.
You are also able to fill the field values with the help of a dropdown list. For that, you tick Use dropdown list (5). In the end you enter the dropdown list that should be used. You can choose from the pick lists you created in Act.
The possibility to fill the field from a dropdown list can only be chosen when creating a field. This property cannot be changed for fields that have already been created. For the values of the dropdown list you can pick several options.
(6) Allow only dropdown list items does not allow individual input.
(7) Multiselect enables you to pick more than one value from the dropdown list.
(8) Enable that the nearest value is shown jumps to the appropriate choice in the dropdown list directly after you entered the first letter.
(9) Standard value: Today - this field is only active when the field type "Date" or "DateTime" was chosen.
In the tab field settings (available for the data types Character, Currency, Decimal, Initial Caps, Lowercase, Number, Uppercase, URL, YesNo) as well as field trigger (available for every data type except from phone) there are some more options for configuring a field.
After clicking on (10) Save the following window appears:

With Yes you can instantly create new fields. In this case, proceed as explained before.
If all needed values were created you pick No.
This query can be turned off by ticking Please do not ask again.
In the main window an overview over all of the fields of the chosen table is displayed. With the buttons below you are able to create, edit or delete fields.

With the button New field you can create new fields. With Edit you can change the properties of an already existing field. By clicking on Copy you create a field with the same properties as the chosen field.
With the button Close you leave the Table Manager for Act!.
