Here you will find the explanation where to find the configuration of Microsoft Teams and everything you need to pay attention to.
First of all, the DIAL|IT add-on must be installed. Our IT specialists will gladly take care of the installation.
To book an appointment with our IT specialists click here.
After that you need to register in the AzurePortal to start with the following steps.
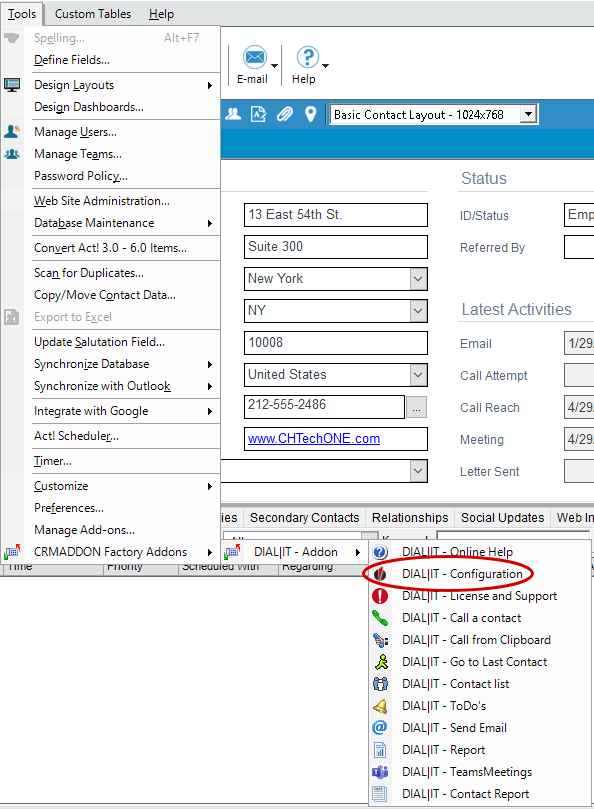
Open your Act! CRM and click on "Tools" then on "CRMADDON Factory Addons".

This window opens, click here on "DIAL|IT Addon" and then on "DIAL|IT - Configuration".
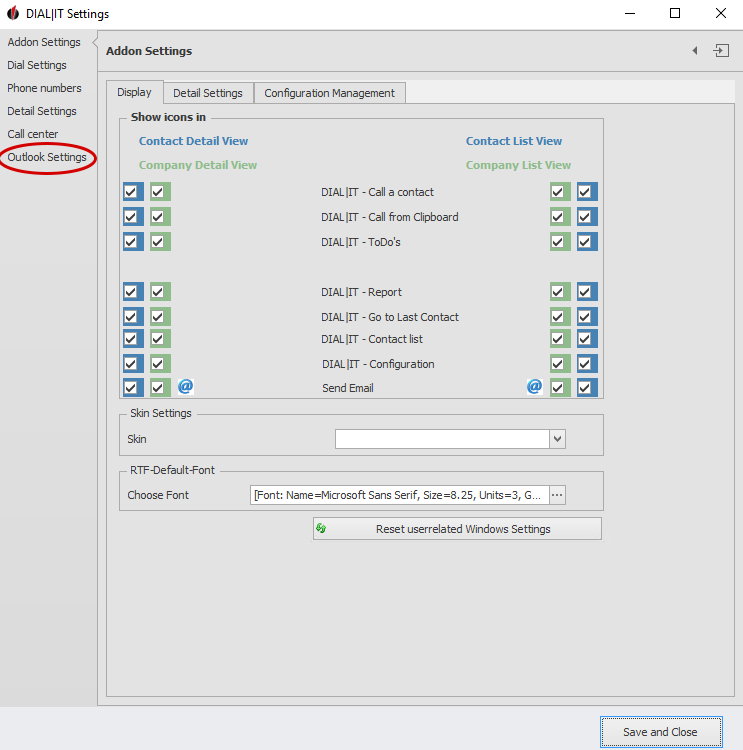
This window will open, click on Outlook Settings.
By clicking on it, this window will open, in the following you will be explained the names and functions.
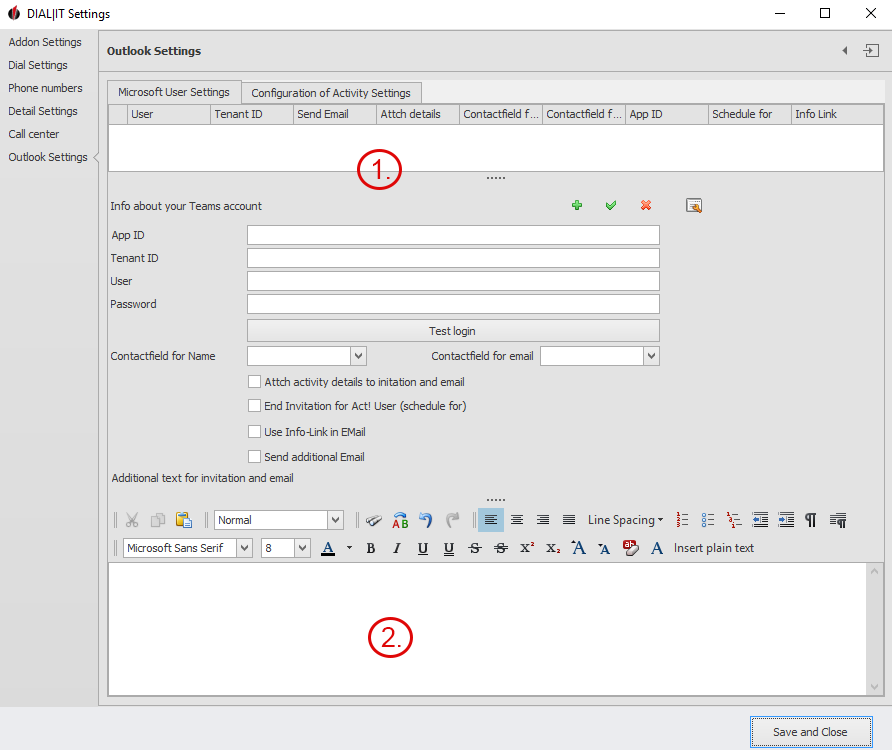
 1. Here you need to specify your existing teams user. This works as follows:
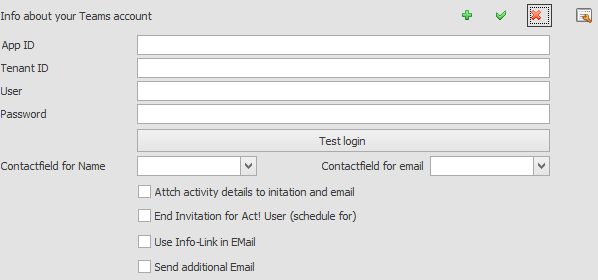
App ID: You can find the application ID through this guide.
Tenant ID: You can find this under Azure AD Admin Center (the instructions are provided with a link).
User: Enter your existing Teams account email here.
Password: The password is the same password as Microsoft Teams.
Contact field for Name: Select Contact
Contact field for Email: Select Email.

Check the box if you want an additional email to be sent after you have created the Act! meeting.
(It is not necessary, an email is automatically sent to the customer when a Microsoft Teams meeting is created in Act!)
If you put a check mark on the box, you will receive such emails:
1. E-Mail:

At the beginning of the email you can decide whether you want to  ,
, ,
,  it or view it in the
  .
.
2. e-mail:

With this mail, you can only see when the meeting will take place and display it in the Outlook calendar.

Check the box if you want the contact to receive a detailed invitation. If you check the box, the customer will receive the following email:

The e-mail is sent to the customer in detail.
After you have entered the above data, you can save under the  , with the plus you can
  the account to Act and with the
  you can delete the specified data.
 2. after you have specified your user.
You can, of course, add your personal footer under the Microsoft Teams invitation.
The following shows how you can add text and image.
In the bar above, you can add your font, font size and font color.
You can choose how the text should be placed left, center and right justified.
You can also select bullets and much more. You can copy images from your file or email signature and add them with the  icon.
icon.
|
In the Advanced edition, you can use only one Teams account in Act! With the Professional Edition, you can use multiple Teams accounts in Act! |

