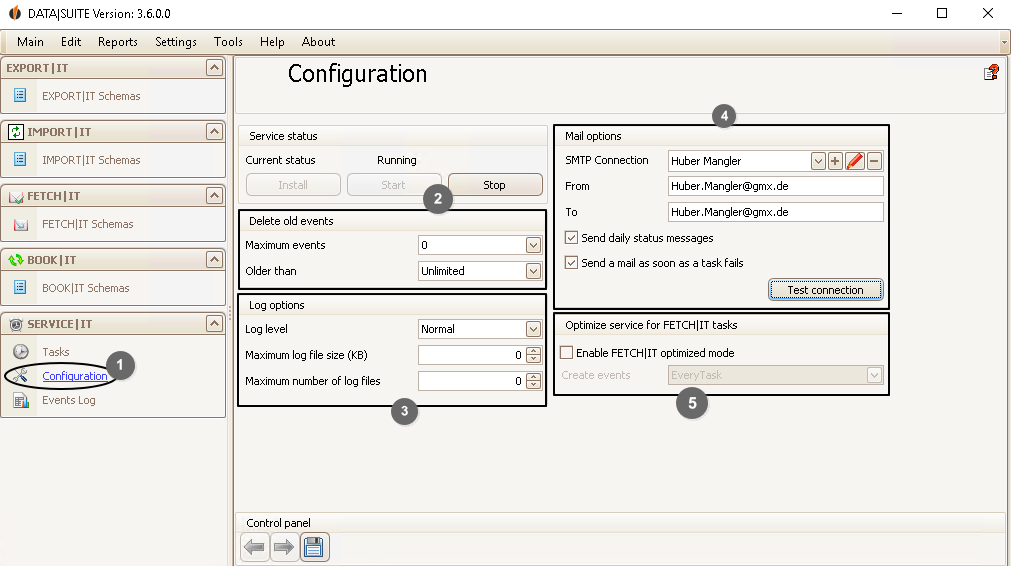
Under Configuration (1) you find several general settings for SERVICE|IT. Delete old events (2)
The events log gets full very quickly when you perform many tasks. In order to get a better overview you can delete old events automatically. Choose how many events should maximally be in the events log until they will be deleted or set how old the tasks are when they will be deleted.
Log Options (3)
Here you can set how exact the tasks will be logged. This is especially important for error detection and troubleshooting. For the log level you have two options: For Normal the error detection is set on low. For Debug the error detection is set on high. The more exact erros are logged the more computer resources are needed for the logging process and hence the usage will take a little more time. The option Normal can be recommend for the daily usage. If you have a problem with the DATA|SUITE our support technicians are more than happy to help you. By setting the Log level to Debug more information is collected. You can forward those logs to us via a ticket (see also How to create a ticket in the SUPPORT|SUITE).
You can also choose the maximum log file size and the maximum number of log files.
Mail Options (4)
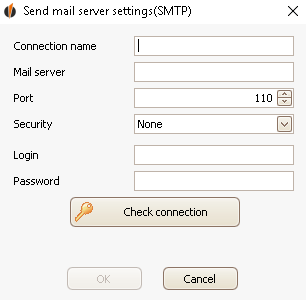
SERVICE|IT offers you the option to send an e-mail log for problems that are occuring. Here you can configure your e-mail. Clik on the + behind SMTP connection:
Enter a connection name by which you can recognize your e-mail connection. After that you enter your mail server, your port, the security type (SSL or TLS) as well the login and the password. You can request this information from your e-mail provider.
Next you click on Check connection. The program will inform you once the connection could be established successfully:
Then you click on OK.
When you get back to the previous window you can click on OK again. You saved the connection.
Now you enter the e-mail you have just configured (From). That way you can send daily status e-mail to another e-mail address. After To you enter the recipient, then you tick Send daily status messages.
You are also able to send a mail as soon as a task fails.
Click on the button Test connection to see if your connection works:
The following dialog will appear:
Click on OK and then check your e-mails.
Optimize services for FETCH|IT tasks (5)
You can turn on the optimized mode for FETCH|IT tasks in SERVICE|IT. In that mode the tasks are performed faster.
A second option of this optimization is that you can decide whether the events (see Run tasks and events log) are created after every task or once a day.
Once you have gone through all of the settings do not forget to save everything (6). |